THANK YOU FOR SUBSCRIBING
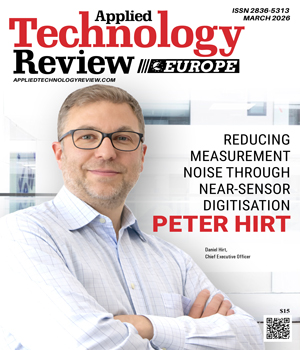
 Daniel Hirt, Chief Executive Officer
The company develops high-precision measurement probes for automated machines and gauging systems based on LVDT technology, a principle historically built around fully analog signal chains. Instead of transmitting sensitive analog signals over long distances, Peter Hirt integrates the signal conditioning electronics directly into the probe. The analog measurement is converted into a digital signal immediately at the point of measurement, reducing susceptibility to interference while allowing calibration to be managed within a closed sensor system.
According to Daniel Hirt, Chief Executive Officer, the objective is a digital sensor that provides reliable and precise measurement data. “With a digital probe, you have a closed sensor system,” he explains. “You get a numerical signal that fulfils modern calibration and measurement standards.” By closing the calibration chain within the probe itself, Peter Hirt aligns precision measurement with the expectations of contemporary automated production.
IO-Link as an Open Integration Layer
 Digitising the measurement signal addresses noise and calibration challenges, but system integration remains critical. Modern production lines rely on heterogeneous automation architectures, and proprietary sensor interfaces often introduce long-term compatibility risks. To avoid these limitations, Peter Hirt adopted IO-Link as the communication interface for its probes.
IO-Link allows high-precision probes to integrate directly into standard PLC environments alongside conventional industrial sensors. For machine builders familiar with IO-Link, integration follows established workflows using IODD files and standard engineering tools. Precision measurement becomes part of the same configuration and commissioning process used for other sensors, reducing complexity and deployment effort.
Openness was a decisive factor in this choice. IO-Link provides access to a broad automation ecosystem, enabling probe data to be routed into higher-level systems through gateways that support OPC UA or MQTT. The same measurement data can help control, monitor, and acquire data without parallel signal paths or additional hardware.
From a signal integrity perspective, IO-Link maintains a fully digital transmission path over standard industrial cabling for up to 10 meters, after which the data typically enters industrial Ethernet networks. By keeping the signal digital almost all the way from the measurement point to the control system, reliance on specialised shielding is reduced, and data stability improves in electrically noisy environments.
Why Mechanics Still Matter
While digital communication is central to Peter Hirt’s approach, mechanical design remains fundamental to measurement performance. The probes use preloaded linear ball bearings rather than sliding bearings, a choice that directly affects repeatability, durability, and long-term stability. Rolling bearings provide smooth, play-free axial movement of the probe shaft, which is critical for consistent measurements. Reduced friction improves repeatability, while the absence of mechanical play ensures stable results over time.
Mechanical precision also supports a standardised digital output concept. Regardless of stroke length, Peter Hirt’s probes report position values in nanometres. Although the probes do not resolve measurements at the nanometre level, the consistent unit structure simplifies system integration and probe replacement. Short-stroke and long-stroke probes produce data in the same format, eliminating scaling errors that commonly occur in analog systems after maintenance.
Simplifying Modernisation and Skills Constraints
The probes adhere to the industry-standard eight-millimeter form factor, allowing for direct mechanical replacement in existing fixtures. Manufacturers can modernise legacy gauging systems without redesigning mechanical assemblies, preserving prior investments while upgrading signal integrity and integration capability.
Digital parameterisation via the PLC also reduces reliance on specialised analog expertise. As experienced measurement engineers retire, newer operators increasingly expect plug-andplay installation and standardised interfaces. With IO-Link, the probe behaves like any other sensor in the PLC environment, allowing faster maintenance and confident replacement without manual recalibration.
Taken together, Peter Hirt’s approach represents a shift from passive measurement components to fully integrated digital sensing nodes. Precise mechanical guidance, near-sensor digitisation, and open communication standards combine to deliver stable, calibrated measurement data directly into modern automation architectures, positioning precision measurement as a foundational element of data-driven manufacturing.
Why Mechanics Still Matter
While digital communication is central to Peter Hirt’s approach, mechanical design remains fundamental to measurement performance. The probes use preloaded linear ball bearings rather than sliding bearings, a choice that directly affects repeatability, durability, and long-term stability. Rolling bearings provide smooth, play-free axial movement of the probe shaft, which is critical for consistent measurements. Reduced friction improves repeatability, while the absence of mechanical play ensures stable results over time.
-
With a digital probe, you have a closed sensor system. You get a numerical signal that fulfils modern calibration and measurement standards.
Mechanical precision also supports a standardised digital output concept. Regardless of stroke length, Peter Hirt’s probes report position values in nanometres. Although the probes do not resolve measurements at the nanometre level, the consistent unit structure simplifies system integration and probe replacement. Short-stroke and long-stroke probes produce data in the same format, eliminating scaling errors that commonly occur in analog systems after maintenance.
Simplifying Modernisation and Skills Constraints
The probes adhere to the industry-standard eight-millimeter form factor, allowing for direct mechanical replacement in existing fixtures. Manufacturers can modernise legacy gauging systems without redesigning mechanical assemblies, preserving prior investments while upgrading signal integrity and integration capability.
Digital parameterisation via the PLC also reduces reliance on specialised analog expertise. As experienced measurement engineers retire, newer operators increasingly expect plug-andplay installation and standardised interfaces. With IO-Link, the probe behaves like any other sensor in the PLC environment, allowing faster maintenance and confident replacement without manual recalibration.
Taken together, Peter Hirt’s approach represents a shift from passive measurement components to fully integrated digital sensing nodes. Precise mechanical guidance, near-sensor digitisation, and open communication standards combine to deliver stable, calibrated measurement data directly into modern automation architectures, positioning precision measurement as a foundational element of data-driven manufacturing.
Precision Measurement Enters the Digital Control Plane
Industrial automation leaders are confronting a quiet yet persistent problem within modern production lines: measurement accuracy degrades long before mechanical systems reach their physical limits. Electrical noise, aging analog infrastructure, and skills gaps around calibration undermine confidence in data that increasingly drives closed-loop control and quality assurance. As factories modernize, the weakest link is often the last meter between the physical measurement point and the digital control system. Addressing that gap now defines the difference between incremental improvement and sustained precision.
Measurement solutions that still depend on long analog signal paths expose plants to interference from welding robots, drives, and power electronics. Shielded cabling, amplifier cards, and manual tuning can mitigate risk, yet these measures add cost and complexity while remaining vulnerable to drift and human error. Digital communication alone does not resolve this issue if the analog-to-digital conversion occurs too far from the measurement point. Precision depends on where that conversion happens and how tightly calibration is controlled across the entire signal chain.
A second pressure comes from workforce change. Expertise in configuring analog measurement systems is retiring faster than it is replaced. Maintenance teams increasingly favor systems that integrate directly into existing PLC environments, behave consistently across sensor variants, and reduce dependence on specialist intervention. Measurement technologies that preserve mechanical investments while modernizing data interfaces offer a practical path forward, particularly in plants running fixtures designed decades ago.
These realities point toward a clear direction. Reliable measurement today depends on integrating signal conditioning as close as possible to the probe, converting data to digital form before noise can distort it, and transmitting that data through an open industrial communication layer that aligns with modern automation architectures. Open standards matter because they protect buyers from vendor lock-in and allow sensors to participate fully in broader data flows, whether feeding PLC logic or higher-level monitoring systems through standard gateways.
Mechanical integrity remains equally decisive. Digital output cannot compensate for play, friction, or inconsistent guidance at the measurement interface. Precision hinges on repeatability, which in turn depends on bearing design, surface quality, and assembly discipline. Solutions that combine rolling linear guidance with play-free construction deliver consistent positional data over long service lives, supporting both accuracy and reparability. Longevity is no longer a secondary concern. Buyers increasingly value equipment that can be serviced and returned to specification rather than discarded.
Within this landscape, Peter Hirt presents a compelling reference point for organizations evaluating advanced digital displacement measurement. Its approach centers on embedding miniature signal conditioning electronics directly within the probe assembly, converting the analog measurement signal to digital form at the source. This architecture sharply reduces sensitivity to electrical noise and removes the need for complex external conditioning hardware. Digital transmission via IO-Link then carries calibrated measurement data up to ten meters without degradation, after which standard industrial networks extend reach further.
The decision to adopt IO-Link as an open interface shapes the broader value proposition. Integration into PLC environments follows established patterns familiar to automation teams, while access to IO-Link gateways enables straightforward data acquisition and edge connectivity through protocols such as OPC UA and MQTT. Parameterization and diagnostics flow through the same channel, simplifying setup and maintenance across diverse applications.
Mechanical design reinforces this digital foundation. Ballbearing guidance without axial play delivers high repeatability across both short and long stroke probes, while a standardized eight-millimeter form factor allows direct substitution into existing fixtures. Consistent output scaling ensures that probe replacement does not introduce configuration errors, even during off-shift maintenance. Reparability extends product life and supports sustainability goals without compromising measurement integrity.
For executives responsible for precision measurement investments, Peter Hirt stands out as a disciplined choice. It aligns digital communication, calibration control, and mechanical accuracy into a coherent system that reduces risk at the point where measurement matters most. In environments where data quality underpins automation performance, this combination represents a measured and credible benchmark.
...Read more
|
|
Peter Hirt
Company
Peter Hirt
Management
Daniel Hirt, Chief Executive Officer
Description
Peter Hirt develops high-precision LVDT-based measurement probes with near-sensor digitisation and IO-Link connectivity, delivering low-noise, calibrated data directly from the machine. Its solutions simplify integration, improve repeatability, and modernise industrial gauging for automated production.
Top


